Way back when SkateFurther first started we had a forum thread about homemade mudflaps. We even ran a competition for the best designed ones! Here’s Eric’s ‘How-To’ on making mudflaps! Thanks Eric!
Mudflaps made of Ikea cutting Boards.
Time needed:
30 minutes or 1 hour, depends on your skills.
Things you need:
1 Ikea cutting board (Drälla)
1 pen/marker
1 industrial scissor or sharp knife
1 Lighter/ creme-brulé burner / gas stove
1 measurement tool.
1 piece of paper
1 piece of cartboard
2 pieces of electrical wire
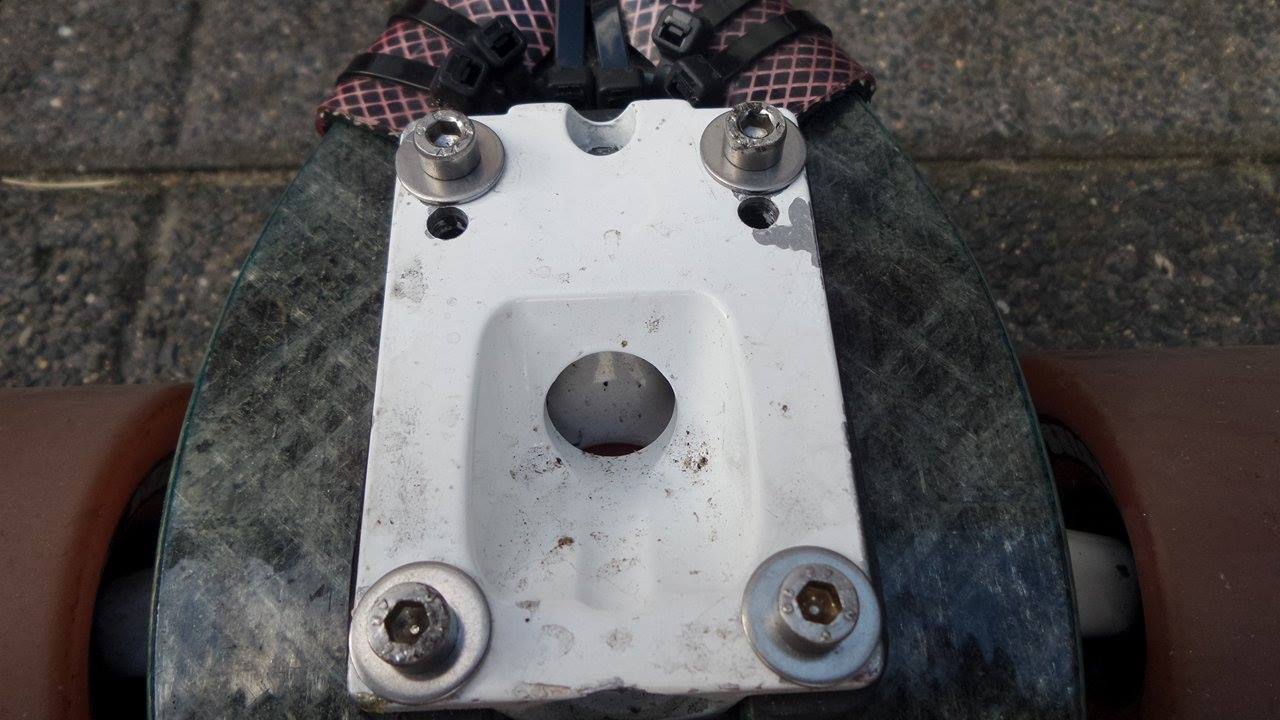
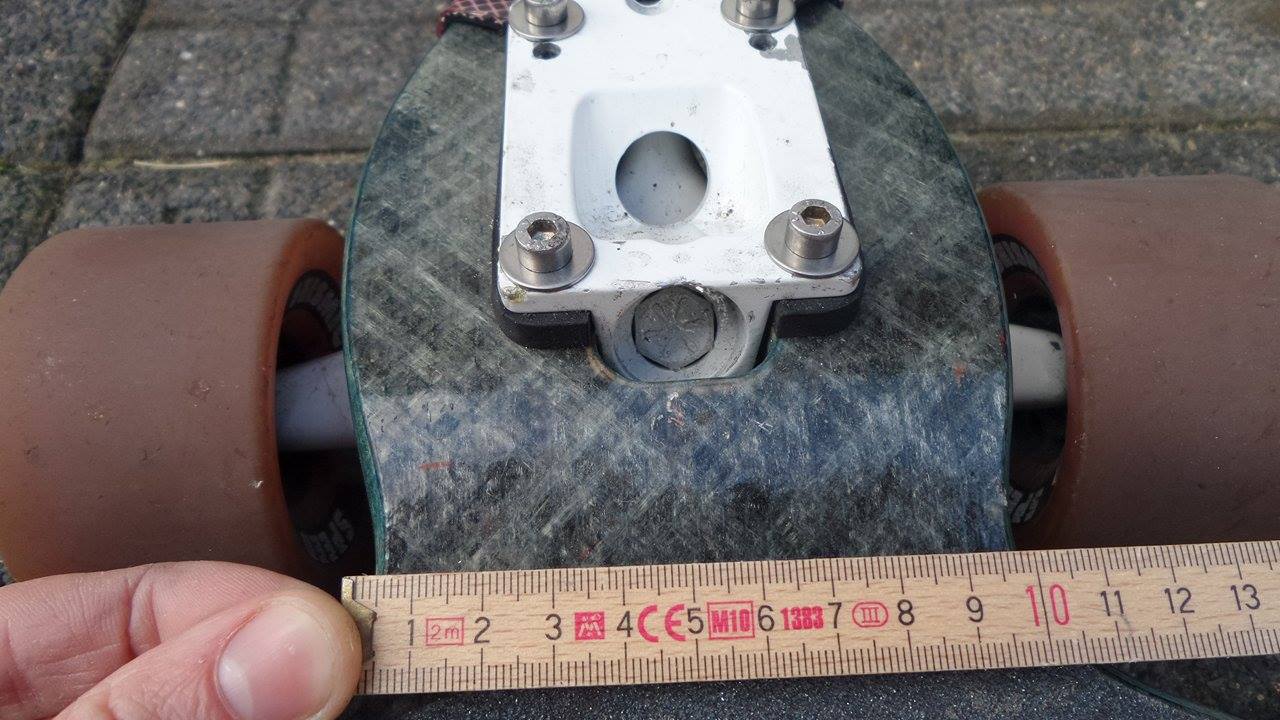
Step 1: You need to figure out if you have oldskool and newschool holes in your deck & trucks, you want to mount the mudflaps through the free holes.Step 2: Grab a piece of paper and measure the width of your deck close to the trucks.
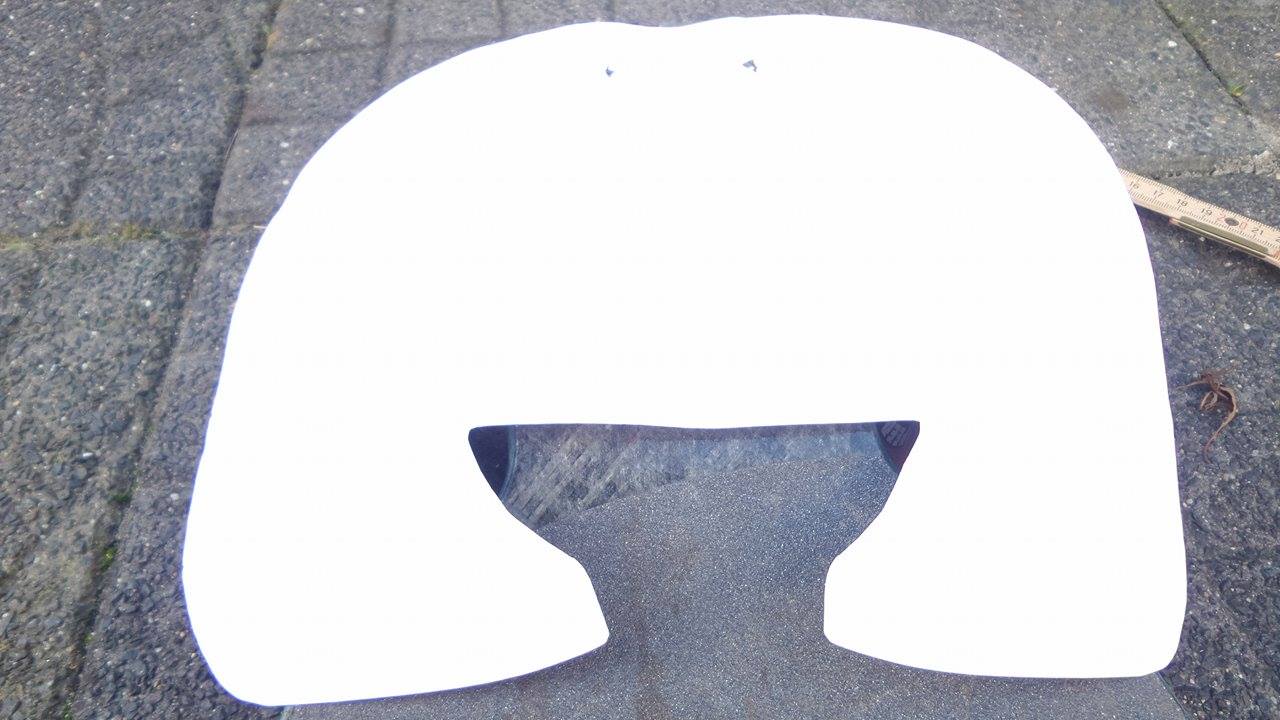
Step 3: Draw your mudflaps design on the paper and cut it out. Does it fit? Good! Does it looks like shit? Get back to the previous step!Step 4: Cut and adjust the paper mudflap until you are satisfied, after that you remake the mudflaps from cardboard.
Step 5: Draw the mudflaps and cut them out. Try them out on your longboard. And adjust them if needed.
Step 6: Make holes in them by making a small and sharp screw redhot in a fire. Melt the holes with the hot screw (watch your fingers!)
Step 7: Put the electrical wire through the baseplates and deck and fold the ends towards the end
Step 8: The mudflaps are now locked and ready.
Step 9: If you do not have these extra holes free for mounting you could attach an elastic to the mudflaps for mounting them on the longboard.
Pro’s:
Easy to make.
They work superb in rainy weather.
Fits in backpack and doesn’t need much space.
Attaching to the board within 5 seconds!
Flexible.
Con’s:
Weight 190 grams.
No other colors.. so it’s red or green!
With regards, Eric
You can find out about what Eric and all the other Dutch skaters get up to on the Dutch Distance Skating facebook page! If you have any cool modifications that you think we need to know about, drop us a line nat@skatefurther.com
3 thoughts on “How To – Homemade Mudflaps with Eric”
I made a set for my G|Bomb Push/Pump board. Took all of 45 minutes. Used elastic cord. Didn’t even make a template from cardboard, just took the measurements and cut out the shape, then fine tuned it. Can’t wait to try it out. Thanks!


awesome tutorial.
Cheers! Plenty more to come!
I made a set for my G|Bomb Push/Pump board. Took all of 45 minutes. Used elastic cord. Didn’t even make a template from cardboard, just took the measurements and cut out the shape, then fine tuned it. Can’t wait to try it out. Thanks!